

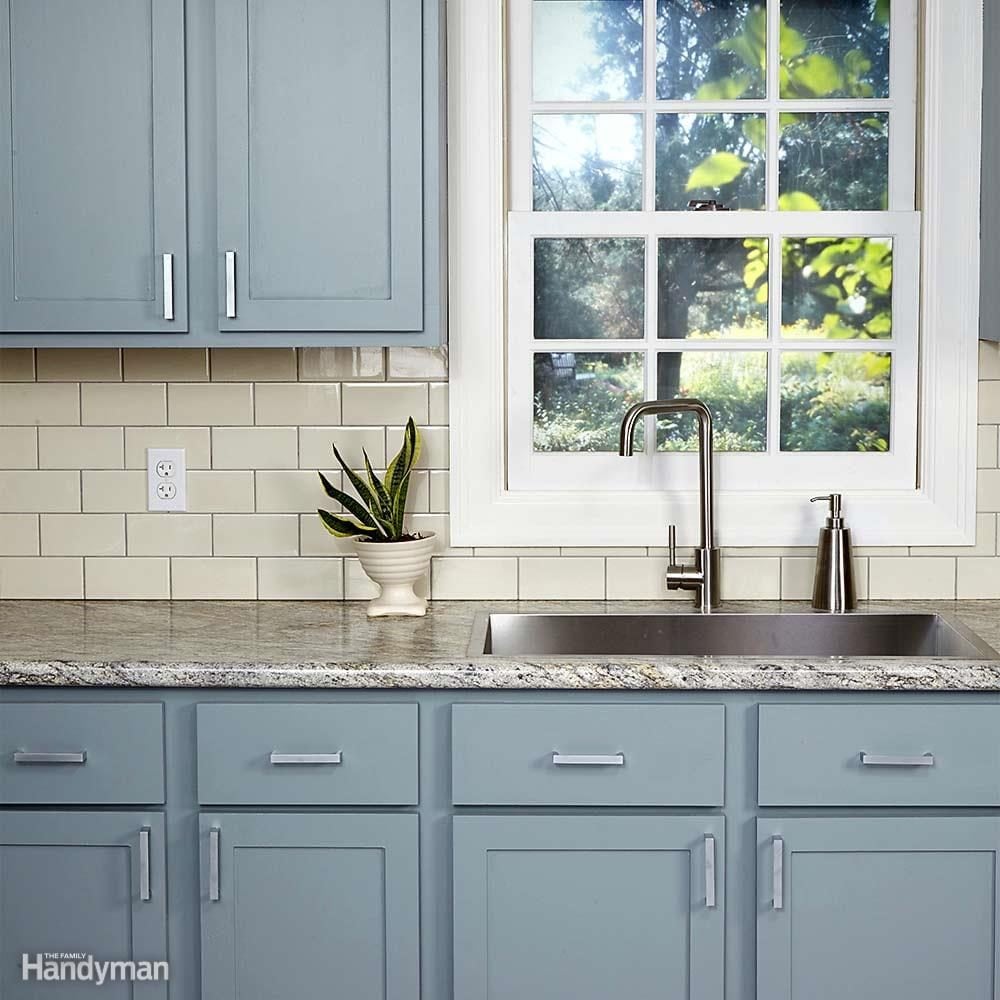
How to Refinish Old White Cabinets
i / 20
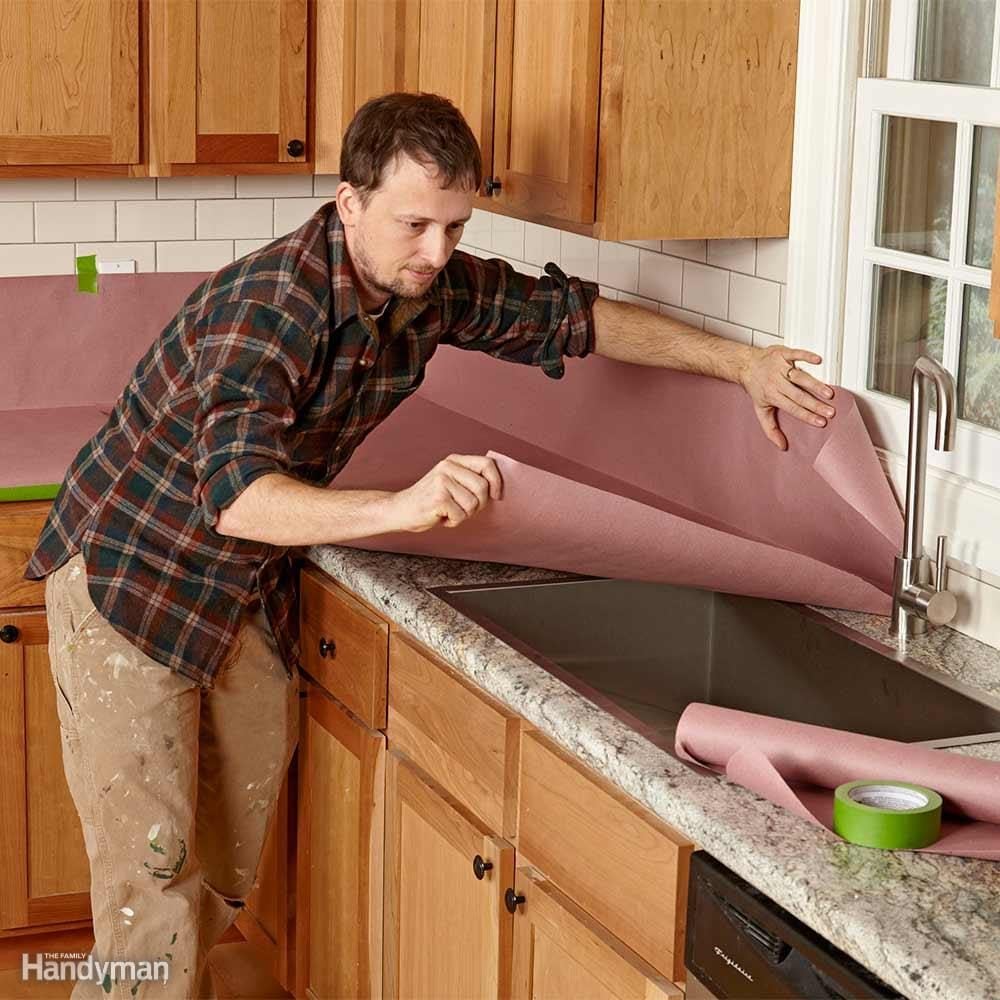
Protect Countertops With Rosin Paper
Painting cabinets is a messy task, and the final thing y'all want is paint all over your countertops equally you lot acquire how to pigment kitchen cabinets. An easy way to protect your countertops, backsplash and floor is to embrace them with inexpensive rosin or brown builder's paper.
A common roll size is 35-in.-wide past 140-ft.-long. When you're done in the kitchen, you'll take plenty of paper left for future painting projects later you lot detect the best paint for kitchen cabinets.
three / 20
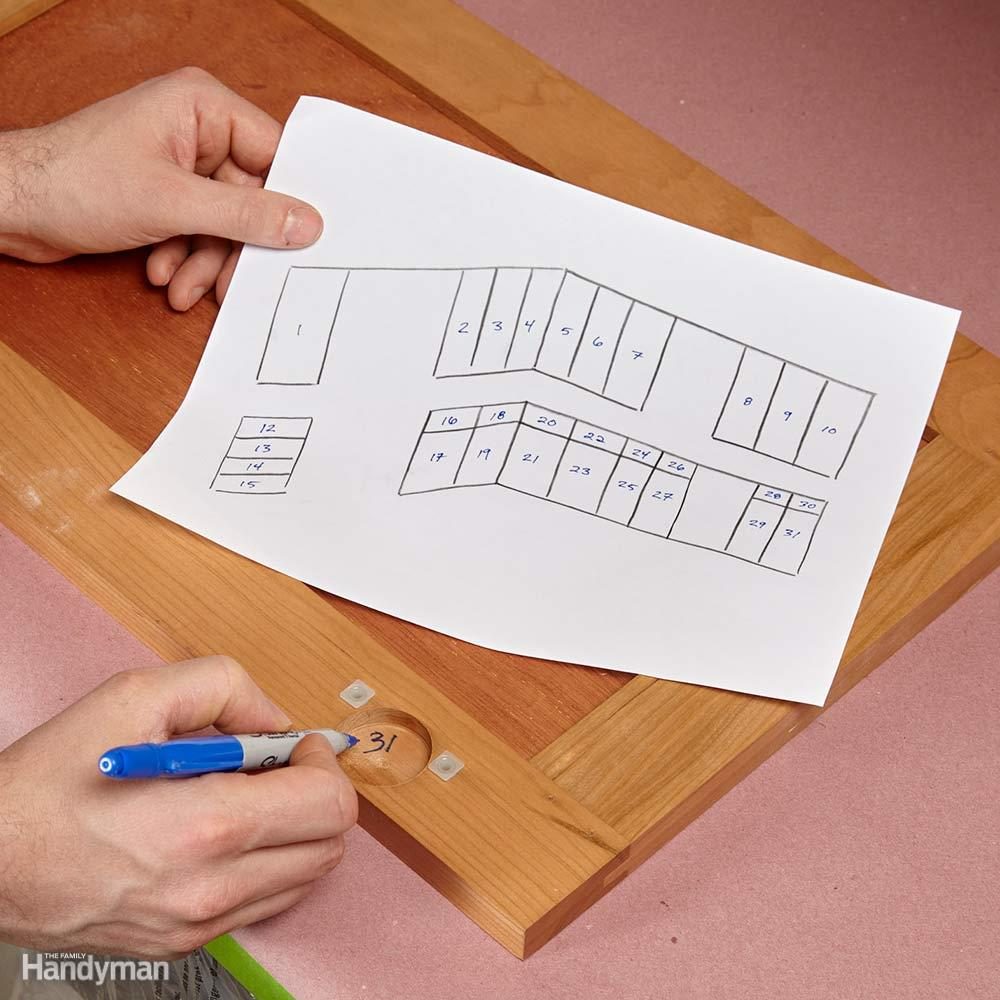
Label Doors
Outset by making a quick sketch or two showing all the doors and drawers equally yous learn how to paint kitchen cabinets. Number them nonetheless you want.
Then label the doors and drawers with the corresponding number when yous remove them. Write under the hinge locations where it won't be visible. Then cover the numbers with masking tape to protect them while you're painting.
4 / xx
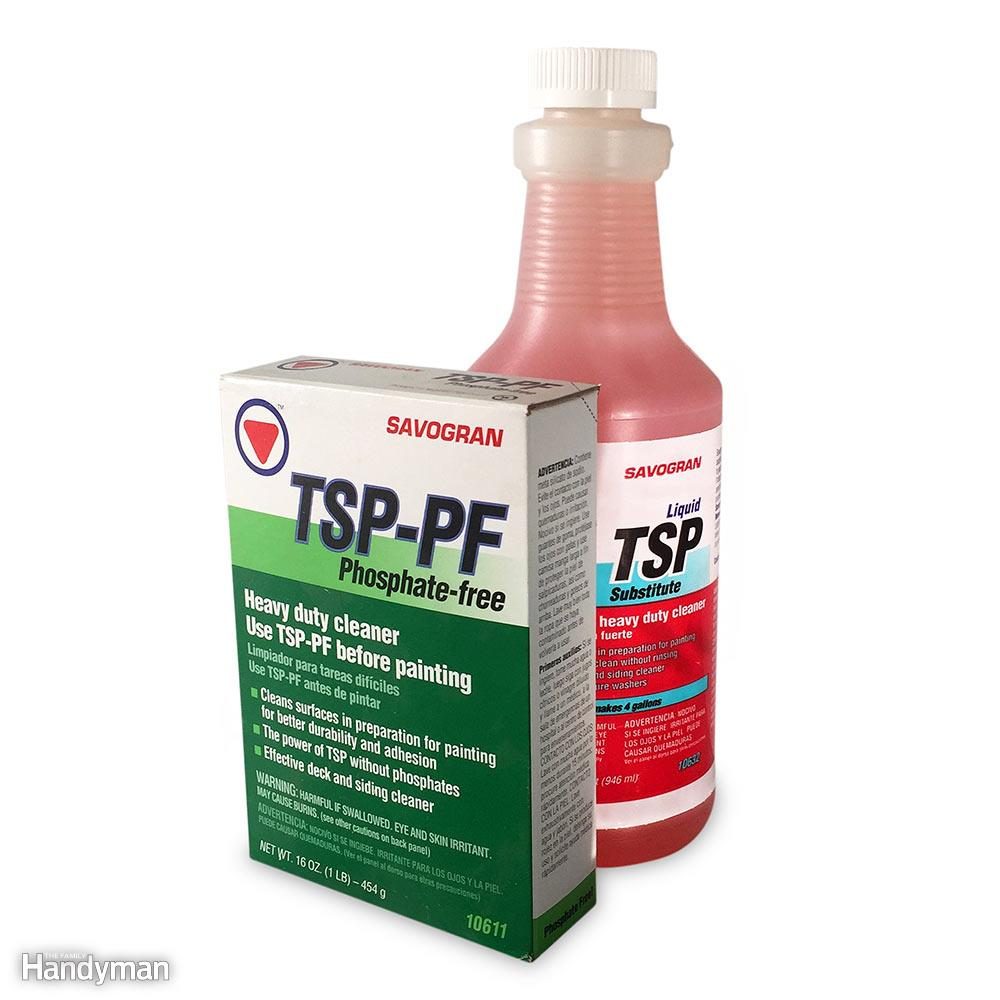
Become the Grease Off
Even the best pigment for kitchen cabinets won't stick to greasy cabinets. And so the first disquisitional step in preparing how to pigment kitchen cabinets is to clean them with a grease-cut solution. Dishwashing liquid will work, but a dedicated grease remover like TSP substitute is even better.
Mix according to the instructions and scrub the cabinets. Then rinse them with clear water and wipe them dry with a clean rag.
5 / twenty
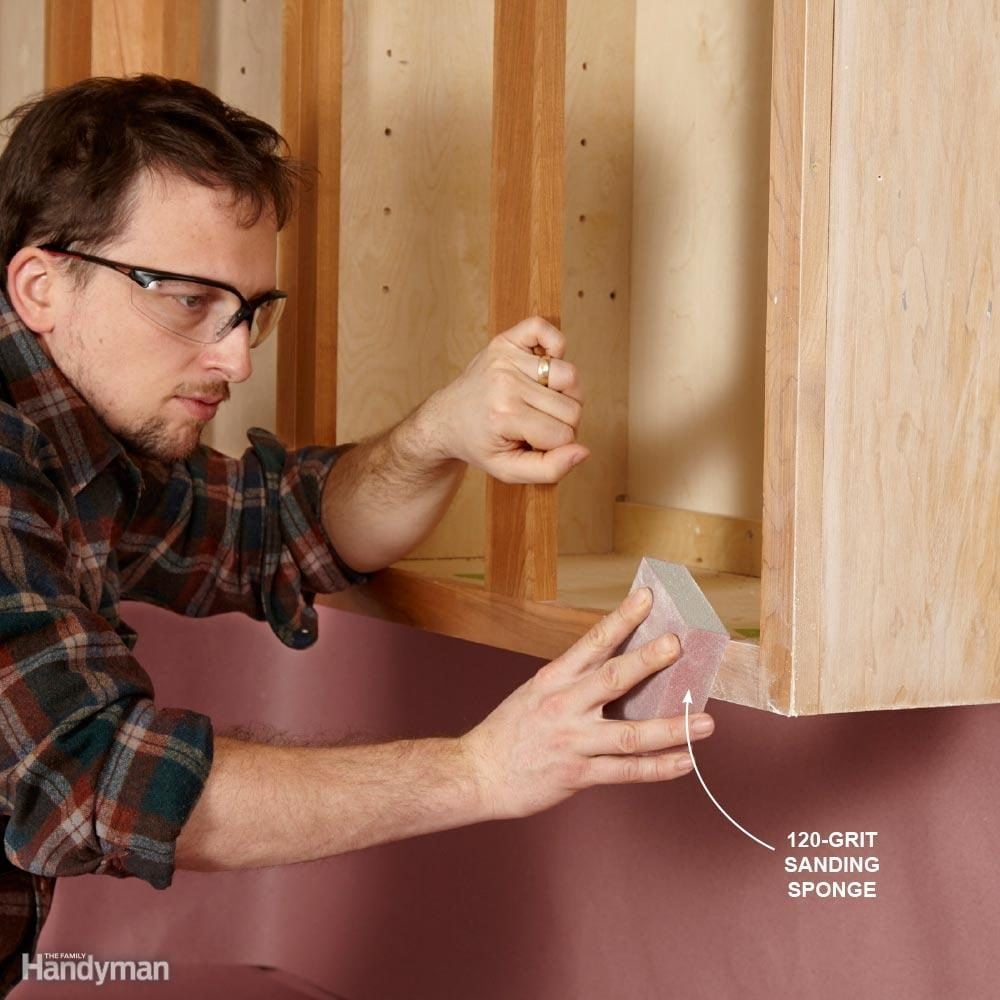
Don't Go Overboard on Sanding
You should sand cabinets before beginning your how to paint kitchen cabinet project to give the new paint a good surface to grip. But you don't need to sand to bare forest.
If your cabinets have a manufacturing plant stop, sand lightly with 120-dust sandpaper or a sanding sponge. If the surface is rough from a previous paint chore or poor varnishing chore, get-go with coarser 100-grit paper to remove bumps. Then sand again with 120-grit to get rid of any sanding marks.
6 / xx
Cull a Fast-Drying Primer
Want to speed up the project? Choose a fast-drying primer for the first coat. Read the label for data on recoating fourth dimension and to make sure the primer is uniform with the pigment you're planning to use.
Pro Tip: Employ an enamel underbody primer. H2o-based paint has come a long way, and some top-quality acrylic alkyd hybrids rival oil-based paint. Still, many pro painters adopt oil-based paint, peculiarly for priming.
Oil-based pigment dries slowly and levels well. This gives yous more than working time and fewer brush marks. Also, when they're dry, oil-based primers like Benjamin Moore Fresh Kickoff Enamel Underbody sand easily providing a perfect base for your cease coat.
7 / 20
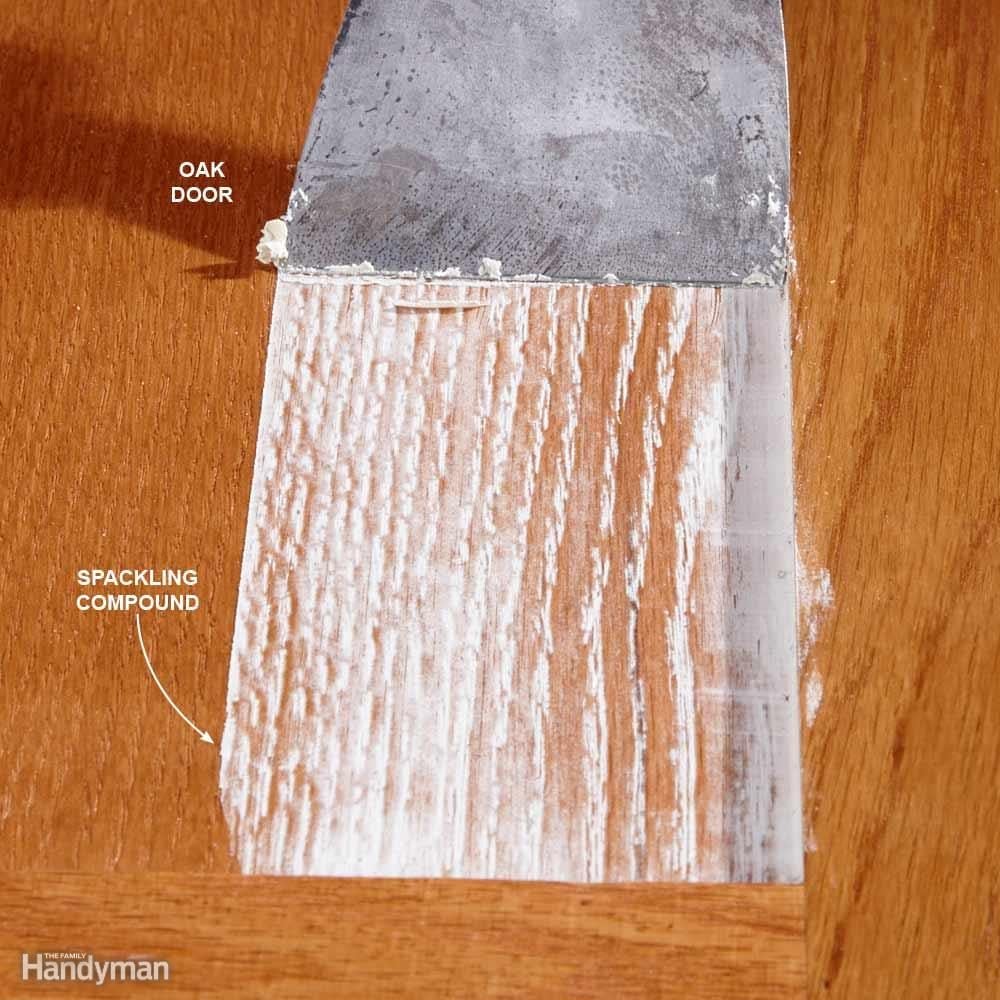
Consider Filling Open Grain
Some types of wood have grain with many open up pores. Oak is a good example. The pores show through finishes and are peculiarly noticeable under pigment. It'due south OK to leave the grain showing, but if you want a smooth, grain-costless expect, y'all'll have to fill the pores before painting.
At that place are a few methods. You tin utilise several coats of a high-build primer, sanding betwixt coats until the pores are filled. Or yous can fill up the grain with spackling every bit shown here. If your cabinets have a lot of curves and molded edges, filling with spackling is more than hard. When the filler dries, sand and prime as usual to finish the chore.
8 / xx
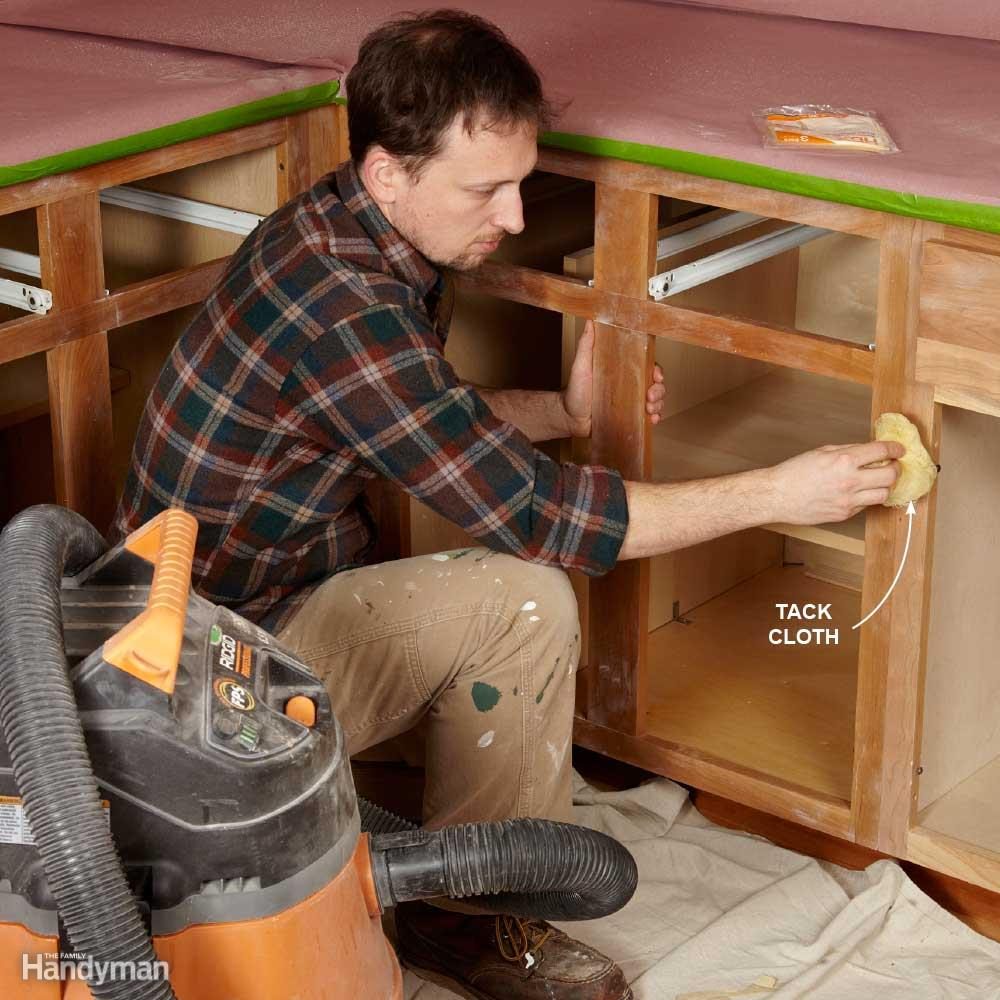
Vacuum, Then Apply a Tack Cloth
To ensure a smooth paint task and good adhesion, it'due south critical that you remove all the sanding dust from the doors, drawer fronts and cabinet frames. Offset by vacuuming everything using a soft bristle brush zipper. This removes loose dust, merely yous still demand to get rid of the rest.
The traditional painter's method is to utilize tack cloths. To utilize a tack cloth, completely unfold it and loosely agglomeration it upwardly. Wipe it gently over the surface to pick up dust. Milk shake it out frequently and re-form the packet to use information technology again. When the cloth has lost its dust-grabbing power, throw it away and get a new 1.
9 / 20
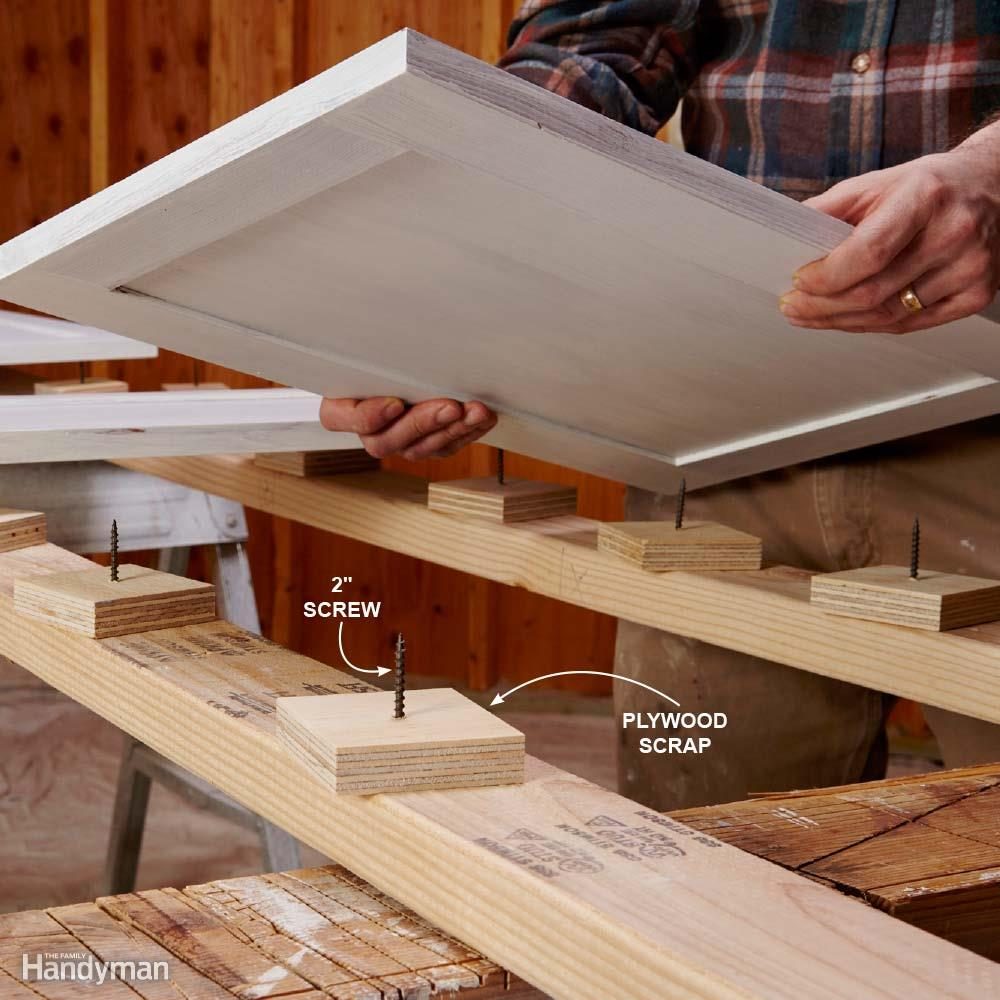
Back up Doors on Standoffs
Y'all can buy plastic painter's pyramids, which work corking for supporting doors while y'all paint them. Or yous can make your own standoffs by driving 2-in. screws through 3-in. square scraps of plywood. If you don't listen a few barely visible dimples on the back of your doors, you can pigment both sides of a door at in one case using standoffs.
Hither's how to get started painting your kitchen cabinets. Paint the back first, leaving the edges unpainted so yous'll have a spot to put your fingers when you lot turn the door over. Paint the back. Then flip the door over and rest it on the screw tips.
Now you can paint the door edges and forepart, then permit the door dry. If you look difficult, you lot can spot tiny indentations where the screws contact the wet paint, simply they're inconspicuous.
10 / 20
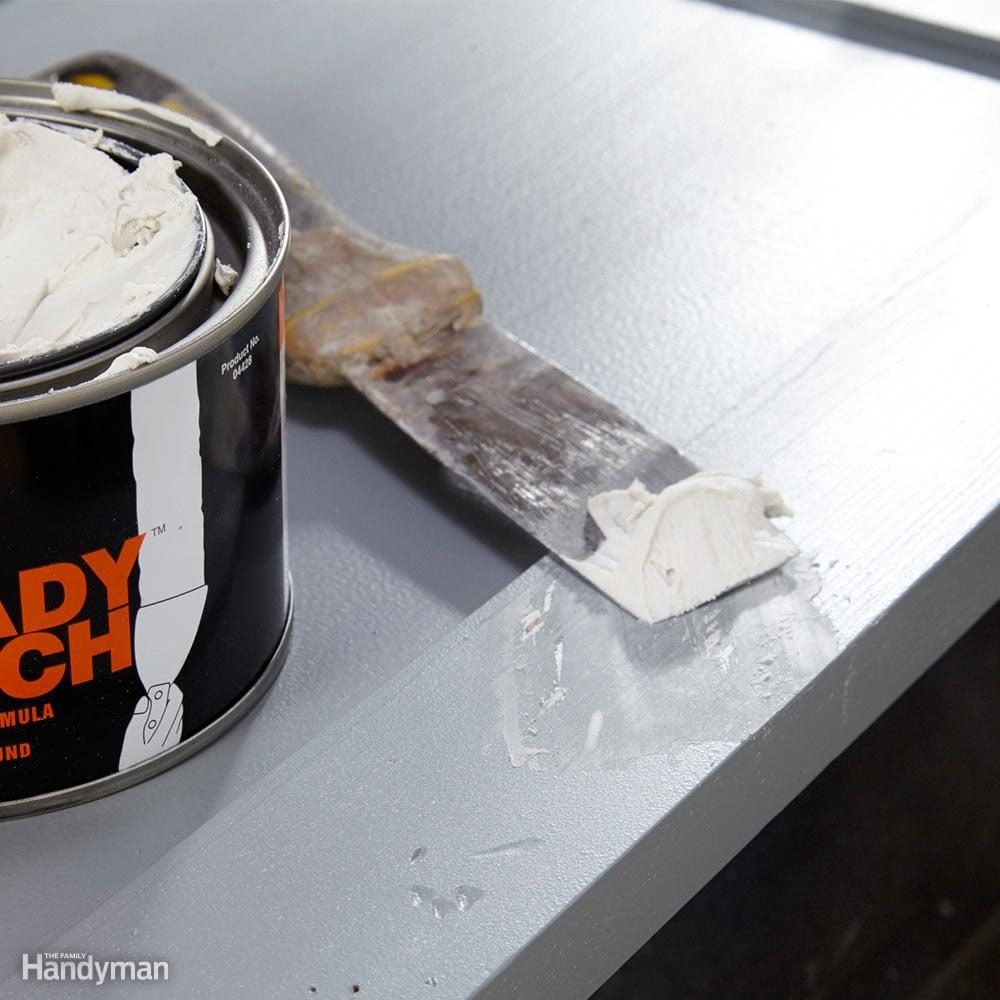
Double-Bank check for Defects Afterward Priming
The first paint-prep stride after cleaning grease from cabinets is ordinarily filling unwanted holes, dents and dings with spackling or woods filler. Later sanding, getting rid of dust and priming the cabinets, it's a good idea to check everything with a vivid light to spot and fill any remaining holes or dents. Information technology'due south normally easier to spot these bug after priming.
We prefer filling with an oil-based spackling chemical compound like MH Ready Patch considering it sticks well and dries hard for a durable repair. But other fillers will also work. The downside of this additional circular of spackling is that you'll accept to reprime the patched areas.
11 / 20
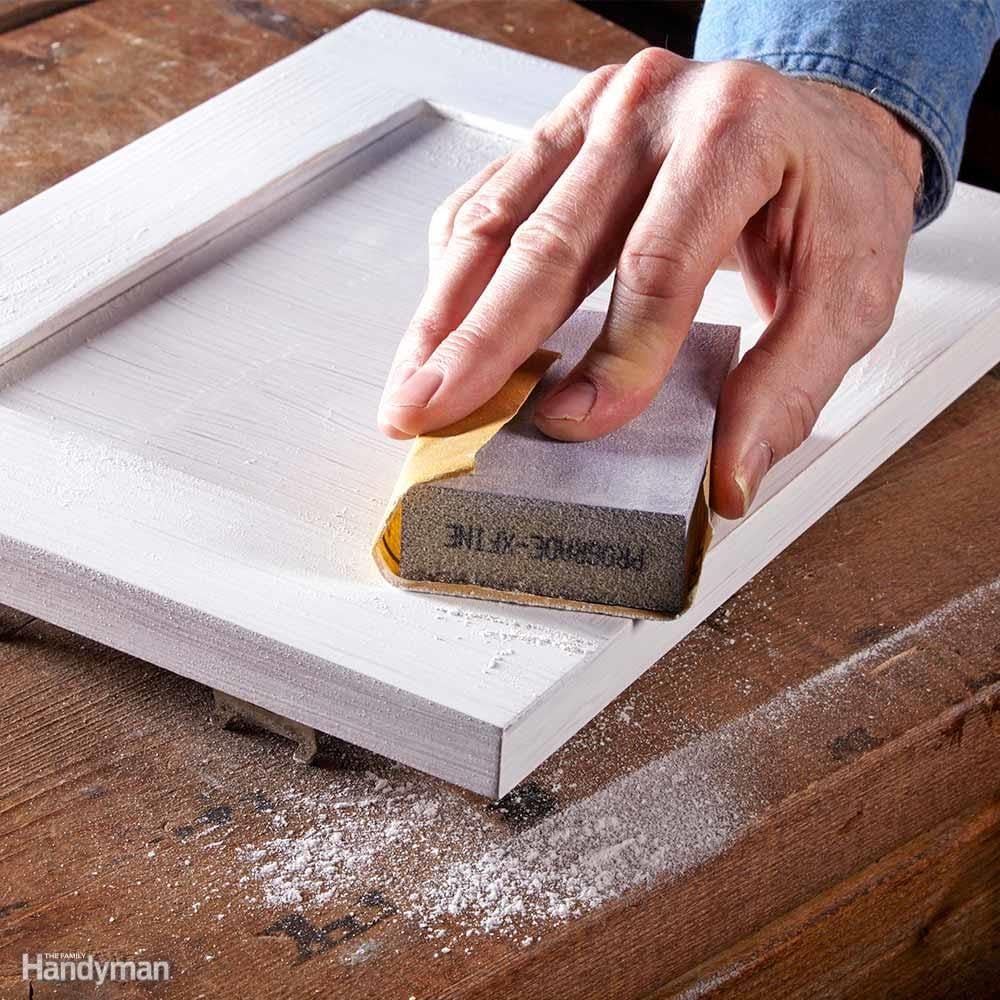
Sand Lightly Betwixt Coats
Dust can settle in the paint or primer as it dries. For the smoothest final coat, sand between coats of primer or paint with 220-grit sandpaper or an actress-fine sanding sponge. And then vacuum and tack every bit usual earlier recoating.
12 / 20
Painting Tools and Techniques: The Basics
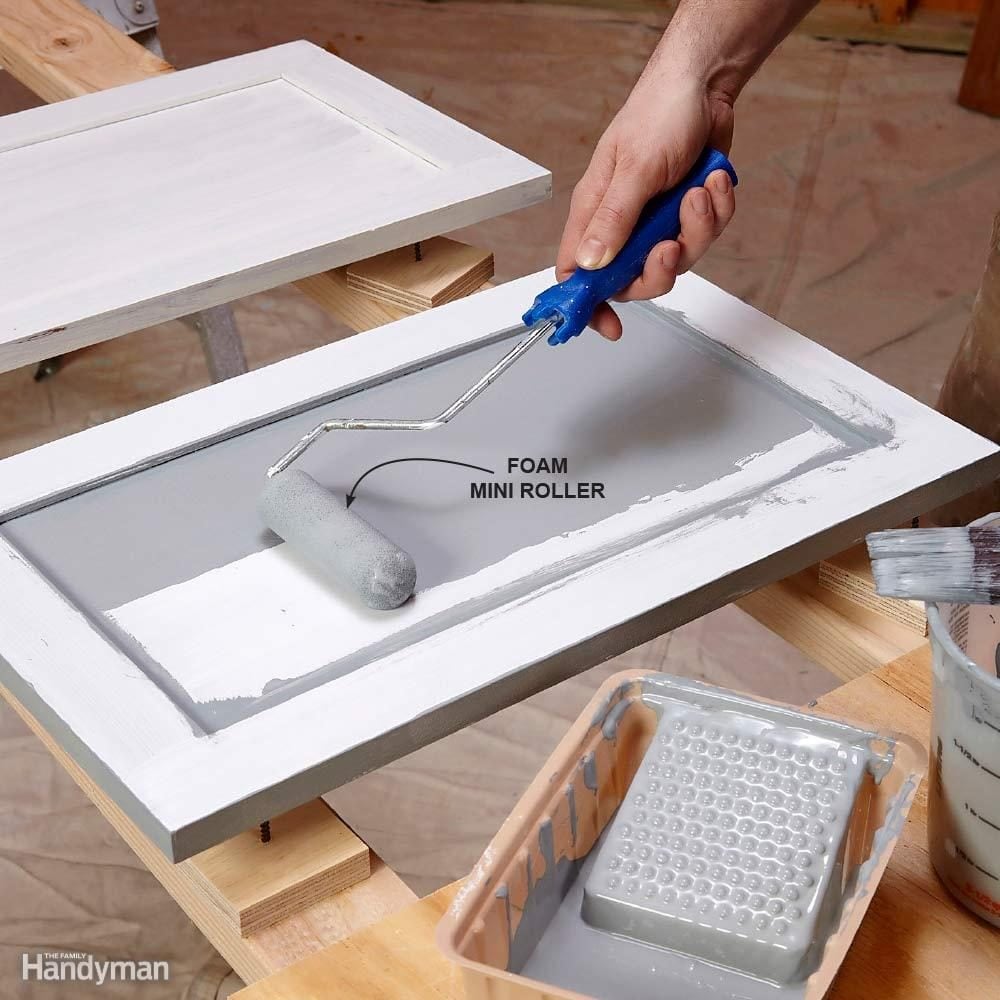
Paint with a mini roller: A proficient painter can work wonders with a brush, but for nigh of usa a mini roller is a great alternative when painting kitchen cabinets. Yous'll detect mini roller frames and sleeves at habitation centers and paint stores.
Type of mini roller: There are many roller sleeves available, just when learning how to pigment cabinets, mohair, microfiber or foam sleeves are good choices. Foam sleeves will go out the smoothest end, but they don't concur much pigment, so you'll be reloading frequently. Experiment on the inside of doors to see which sleeve works all-time with your paint.
Follow the woods grain: If you're painting frame-and-console cabinet doors, follow the direction of the wood grain with your finishing brushstrokes. The vertical stiles should receive the concluding brush strokes running from top to bottom.
Roll, and then brush: If you lot're old-school and nevertheless like to paint with a brush, you lot tin can speed things up by get-go applying the pigment with a mini roller. Roll on the paint. Then elevate paintbrush bristles lightly over the surface to even out the coat and eliminate roller marks.
13 / 20
How to Choose the Correct Paint for Kitchen Cabinets
Read the label and choose a paint that's formulated for painting woodwork and cabinets. And remember, glossier surfaces highlight imperfections, and then unless you're a very meticulous painter, consider an eggshell or a satin sheen.
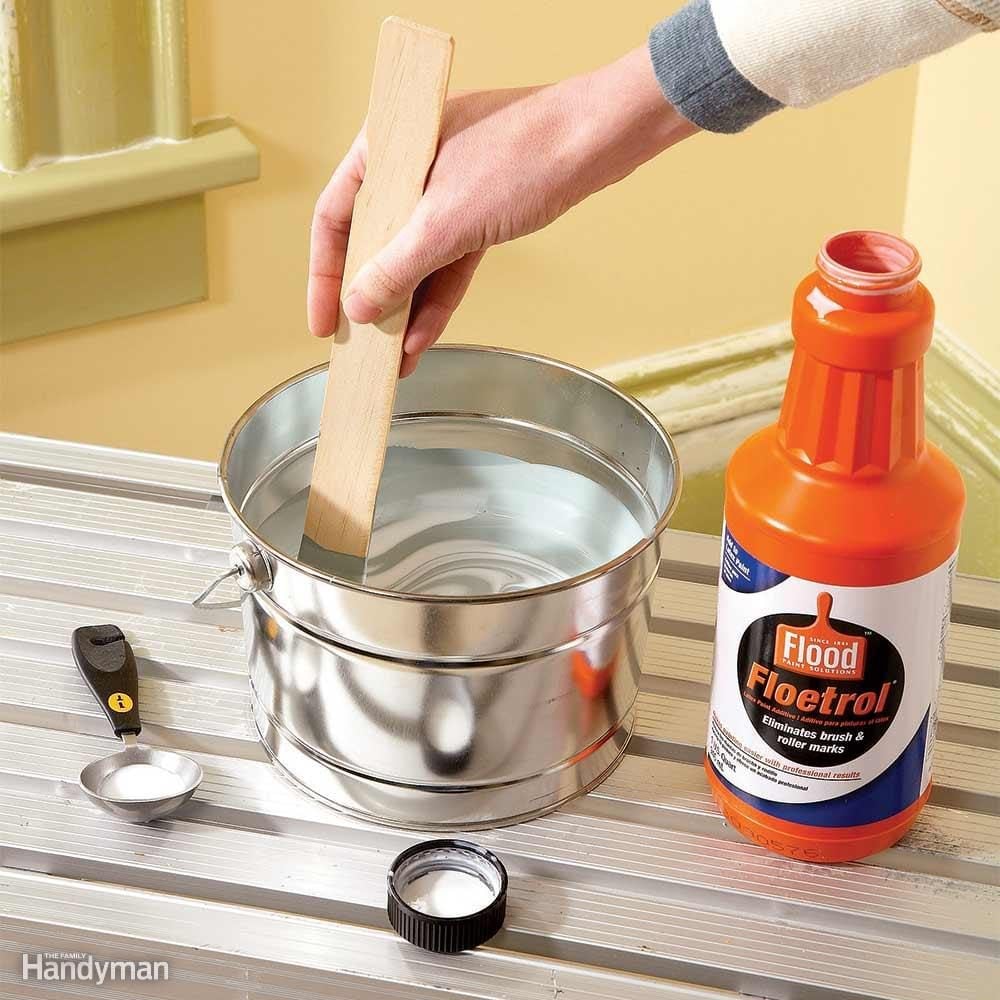
If your paint seems too thick and isn't leveling out after information technology's applied, try mixing in a paint conditioner like Floetrol. Read the instructions for the correct proportion of conditioner to paint. Conditioned paint is often easier to apply and dries to a smoother finish.
fifteen / 20
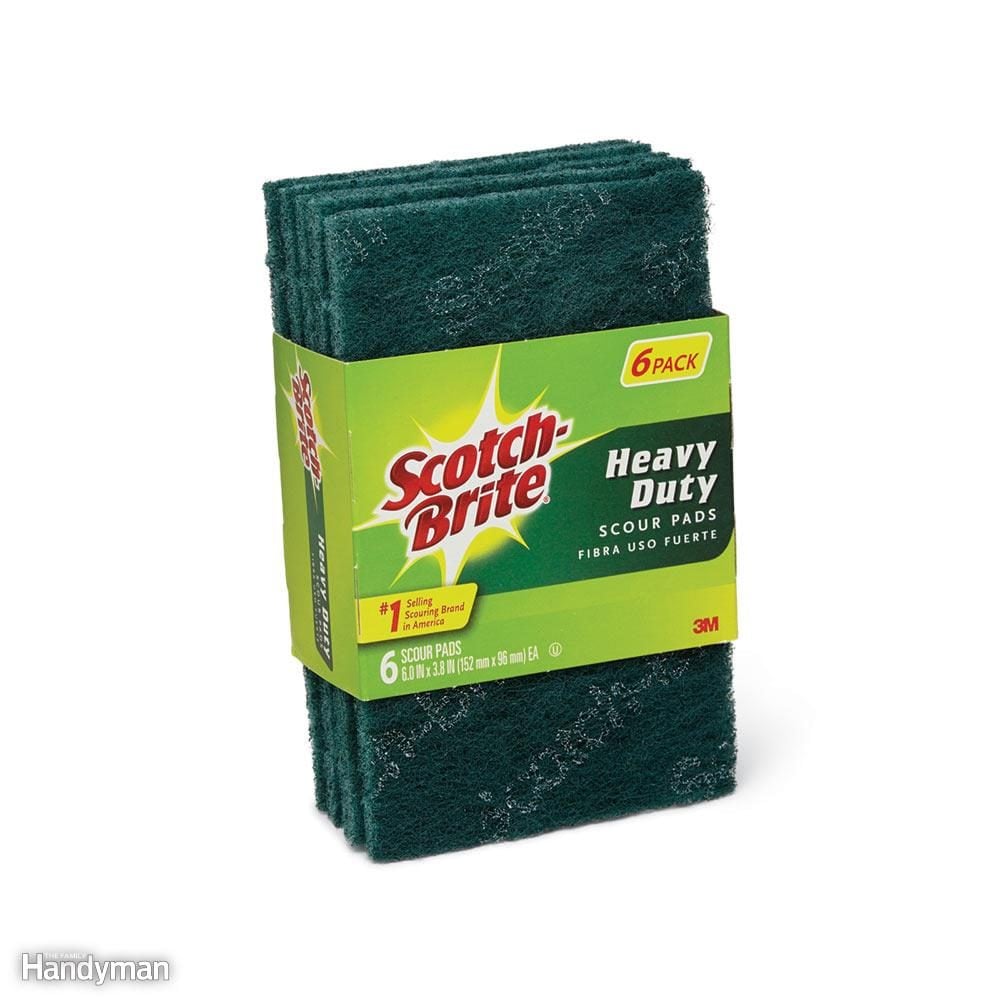
Scuff Up Profiles With a Pad
When you're sanding a smooth finish to provide a ameliorate surface for paint, use a green abrasive pad to sand the molded profiles. Sandpaper doesn't conform well enough to get into all of the intricate spots.
xvi / 20
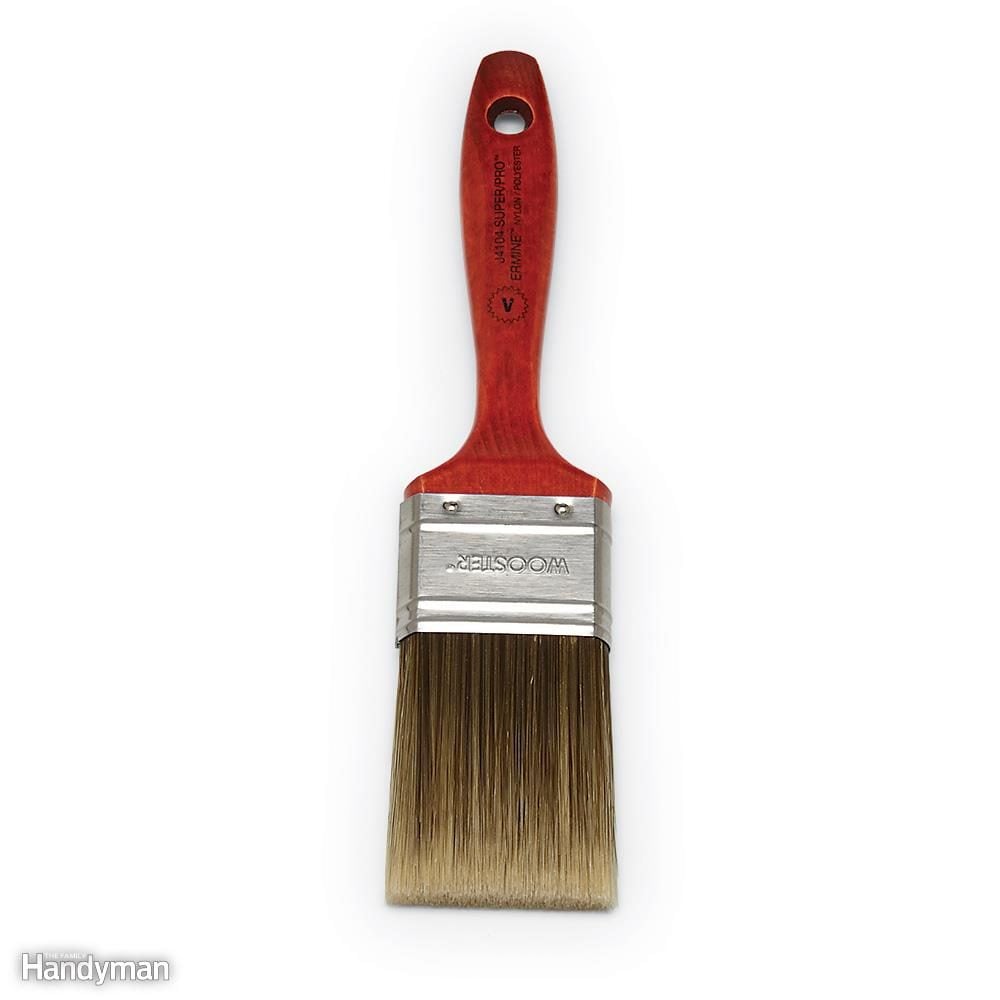
Buy a Tiptop-Quality Brush
If you decide to paint with a castor, splurge on a good one. For cabinets, a 2-in. brush like the one shown here is just about perfect. Keep it clean and it will last for many paint jobs. Paint stores normally offer the widest selection and the best communication.
Pro Tip: Dampen your brush. It'south easier to clean your brush if you dampen it with water (for water-based paints) before you start painting.
17 / 20
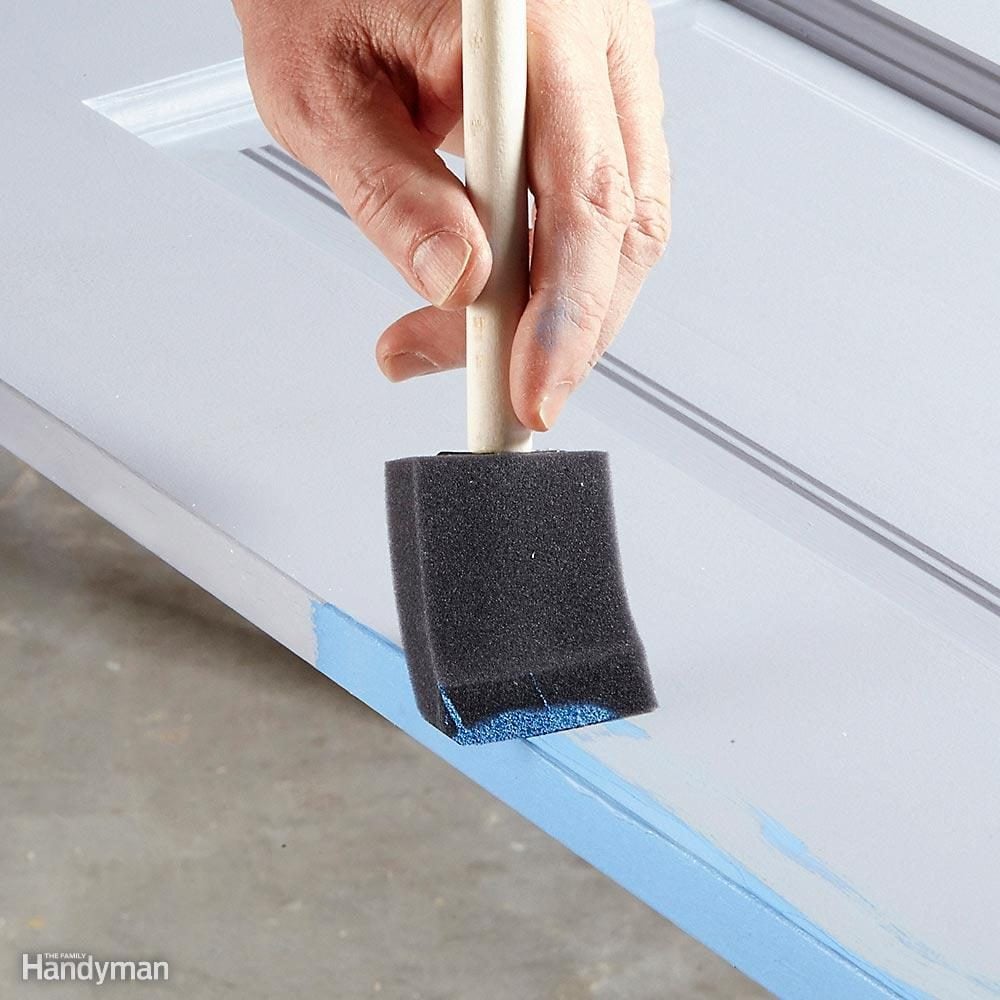
Wipe the Edges
When yous're painting the edge of a cabinet door, it'southward easy to utilise too much pigment and create a buildup along the edge. To avoid a stale ridge of paint forth the door edge, smooth out whatsoever paint that's lapped over onto the adjoining surface with a paintbrush or small sponge brush of your painted kitchen cabinets.
18 / 20
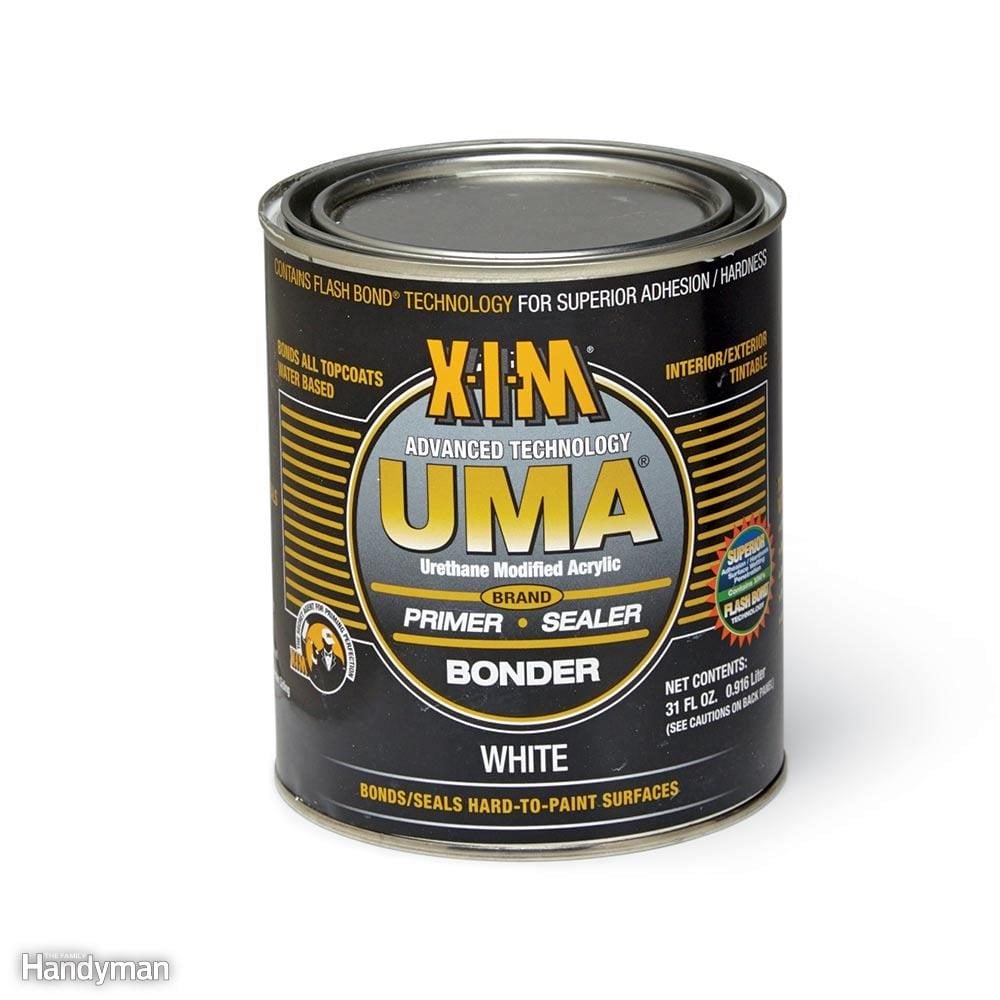
Worried Near Adhesion? Try Acrylic Urethane
Acrylic urethane has many properties that arrive a perfect primer for cabinets. First, it sticks tenaciously to near any surface. Yous could even paint over plastic laminate cabinets with acrylic urethane.
Acrylic urethane likewise cures to a very hard and durable end. You can use acrylic urethane primer and cover information technology with your selection of paint. Or you tin use acrylic urethane paint every bit the final glaze too.
19 / 20
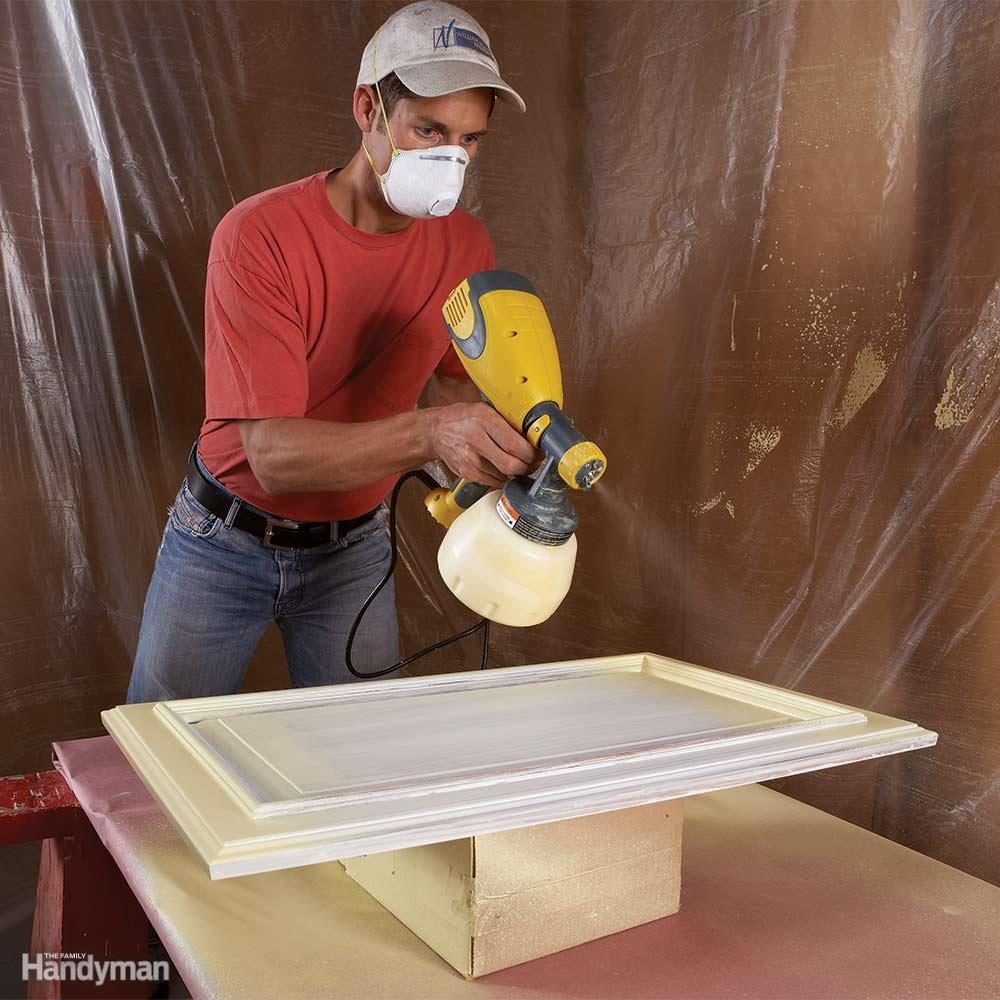
Consider Spray-Painting the Doors
With a petty practice and a practiced sprayer, you tin achieve factory-finish quality by spraying your doors. A pro-quality airless sprayer will work best to spray unthinned water-based finishes. But you can also become keen results with a high-volume, low-pressure (HVLP) sprayer.
Merely be sure to thin the pigment according to the instructions and utilize several sparse coats rather than one thick one.
20 / twenty
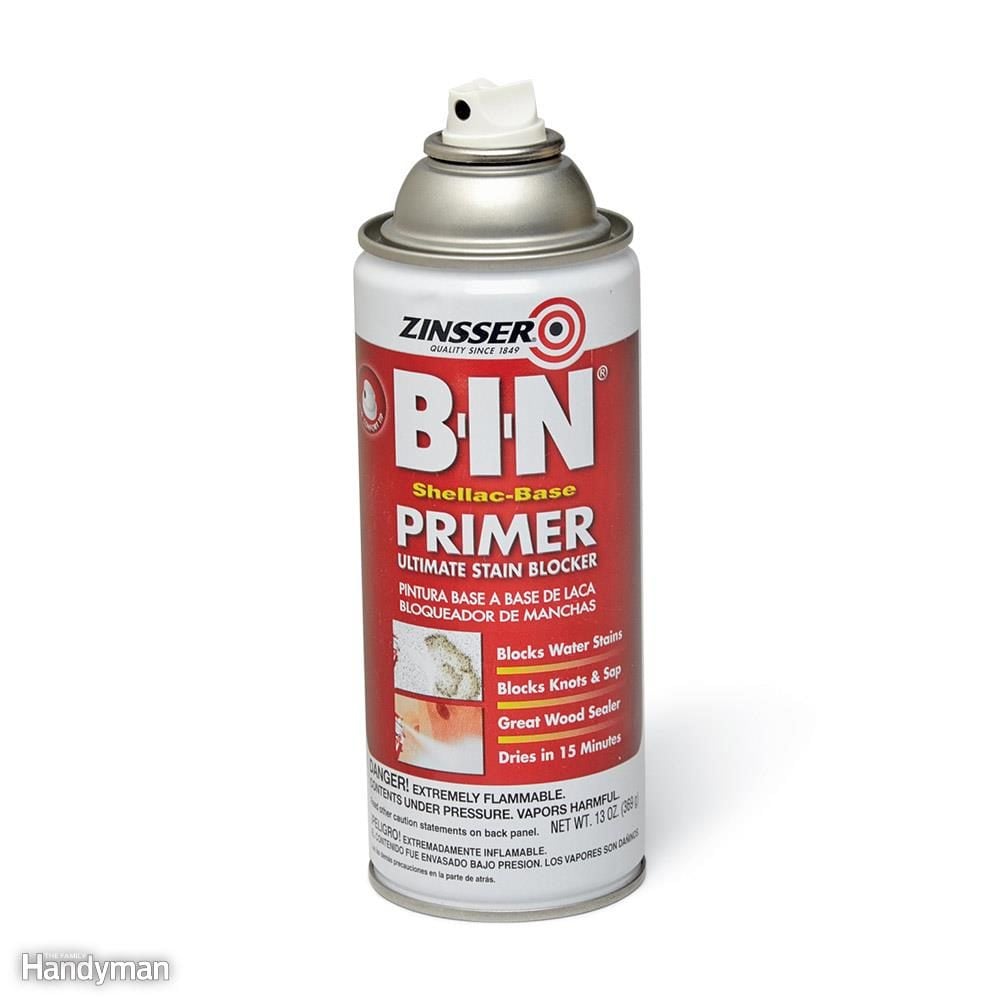
Spot-Prime With Shellac
Pigmented shellac in a spray tin can (BIN is one brand) is perfect for spot-priming areas you may have missed or areas you have patched and sanded. Shellac sticks well to most finishes, dries rapidly and covers well.
Up adjacent, bank check out these genius painting hacks.
Originally Published: February 10, 2021
Source: https://www.familyhandyman.com/list/surprising-tips-for-painting-kitchen-cabinets/
0 Response to "How to Refinish Old White Cabinets"
Post a Comment